Thursday, May 27, 2010

Serving Suggestion: Flank steak and arugula


Sometimes there are dishes that I make that are so simple that they don't really have a recipe. It's usually something that I've made so many times that I've memorized the list of ingredients and I don't measure anything, I eyeball it. Or sometimes it's a dish that is exactly what it says it is, such as Flank Steak with Arugula. I like to refer to these dishes as serving suggestions. No recipe, no measuring. Just a simple combination of food. The perfect antidote to the midweek dinner brain freeze.

I've posted before about pan grilling a steak, and I can't stress how easy it is to do. I was always skeptical of the idea, but now I find that we do it every few weeks, whenever we get that hankering for a hunk of meat. I just bought a huge (I mean huge) container of arugula, and I figured the peppery greens would be a perfect partner with steak.

Here's my serving suggestion: salt and pepper both sides of the steak, massage some olive oil into the meat. Get a grill pan or cast iron skillet really hot (if you're using the grill, better yet). Put the steak in the pan for 6 minutes per side for medium rare. Let the meat rest for about 5 to 10 minutes to continue cooking slightly. Slice thinly across the grain. Toss greens with a drizzle of olive oil and small splash of balsamic vinegar. Make a bed of greens on each dinner plate and top with the sliced steak. That's it.

Now I need to come up with a few more ideas with arugula. I think I'll try to make a pesto. Anyone have any other arugula recipes or serving suggestions?

Tuesday, May 25, 2010

En garde! The fencing has begun


I got the chicken wire fencing and metal posts, and three hours later I had a fenced in garden. It was easier to do than I thought it would be. The hardest part was getting the fencing tight enough. I initially planned to run the posts every five feet apart, but the guy at Agway suggested doing every ten feet, and if the fence was drooping just use a wooden stake at five feet to pick up the slack. I only had to do that twice. I think it turned out pretty good.

To make sure that the bunnies stay out, I installed the fence at 4 feet high with an extra foot resting on the ground to prevent any critters from digging under the fence. Then I took some old planks from the compost bin in the back of the yard and ringed the edges of the garden with those.

I found an old window frame in the shed and wrapped the left over chicken wire around it to make a gate. I nailed some broken pieces from an old wooden privacy fence on the top to make a handle so that we aren't grabbing any stray, jagged edges of chicken wire. It has instant charm. Now I need to get the last two posts in the ground and hinge the gate to one of them. That wil require a post digger. I just hope this turns out better than the ladder fiasco.

Wednesday, May 19, 2010

Leftovers Reinvented: Turkey Posole


My mother packed us a care package with a whole, roasted turkey Sunday night when we left Copake to return to the city. We ate it with some stuffing and gravy on Monday night. By Tuesday we still had quite a bit left, but I couldn't bring myself to eat another standard turkey dinner. I was craving something like a chili or soup. So I came up with the idea of combining the two into my version of turkey posole.

Posole, the Mexican pork and hominy soup, is traditionally eaten at Christmastime. Yet, variations of it made with chicken seem to lend it a year round quality. I thought that dark meat turkey would be a nice change and make the soup a little richer than chicken. The hominy adds a distinct corn flavor that is so delicious. And since corn is on Vivi's short list of acceptable vegetables, why not try hominy. (Not so fast Germann. Although not a complete disaster, it wasn't exactly a huge hit with the kindergarten set.)

I've only cooked with hominy once before, in a pot roast recipe that had the corn added for the last 20 minutes of cooking time. It added such a unique and hearty taste to the dish that I really wanted to try using it again. I followed a similar approach and simmered the soup for over an hour before adding the hominy, and then I cooked it for another half hour.

The soup itself is flavorful but it's the toppings that get really exciting: cilantro, queso fresco, chopped jalapenos (for the grownups), radishes, and limes for squeezing. You could also use chopped avocado or tomato. The cheese gets soft and melts slightly in the bowl and the cilantro adds that "fresh-air" quality that I love. (A friend once described eating cilantro as just like eating fresh air. I love that description.) The toppings can be adapted to what your family likes and what you have on hand.


Here's the recipe:

Turkey Posole (serves 4)

2 tablespoons olive oil
1 medium onion, chopped
1 tablespoon chili powder
1/2 teaspoon cumin
1/2 teaspoon salt
3 cups shredded turkey meat (I used white and dark meat)
1 14 oz can whole, peeled tomatoes plus juices
6 cups chicken stock
1 14 oz can hominy, drained

Suggested toppings:
sliced radishes
chopped cilantro
queso fresco (or feta)
chopped jalapenos
chopped tomato
chopped avocado
tortilla chips

Heat the oil in a Dutch oven or stock pot over medium heat. Cook the onions until soft, about 5 minutes.

Add the chili powder, cumin, and salt and cook until fragrant, about 5 minutes, stirring frequently. Crush the tomatoes by hand over the pot and stir in their liquid. Add the chicken stock, raise the heat to high, and bring to a boil.

Add the turkey, lower the heat, and simmer for an hour. Stir in the hominy and cook for another 20 to 30 minutes until the soup has cooked down a bit and the hominy is heated through.

Ladle into bowls and pass the toppings.

Tuesday, May 18, 2010

Dessert from the backyard


One of the things that I really want to achieve this summer is to grow most of our vegetables in our backyard garden. Last year we bought a share in a CSA, which provided more vegetables than we could eat each week (hello, kohlrabi!). After a long discussion about the convenience of having vegetables delivered vs. the work involved in planting a garden, we eventually decided to take the plunge and grow our own. Neither Fred nor I have ever tended a garden, so this is a learning experience for both of us. He pretty much left it to me to decided what to grow, so I'm going to start a few things from seed (lettuces, radishes, carrots, peppers) and a few from seedlings (tomatoes, herbs), which I'll pick up at a farmer's market. I plan to get the seeds and plants in the ground Memorial Day weekend. The frost will have ended by then, and the soil will be ready for planting.

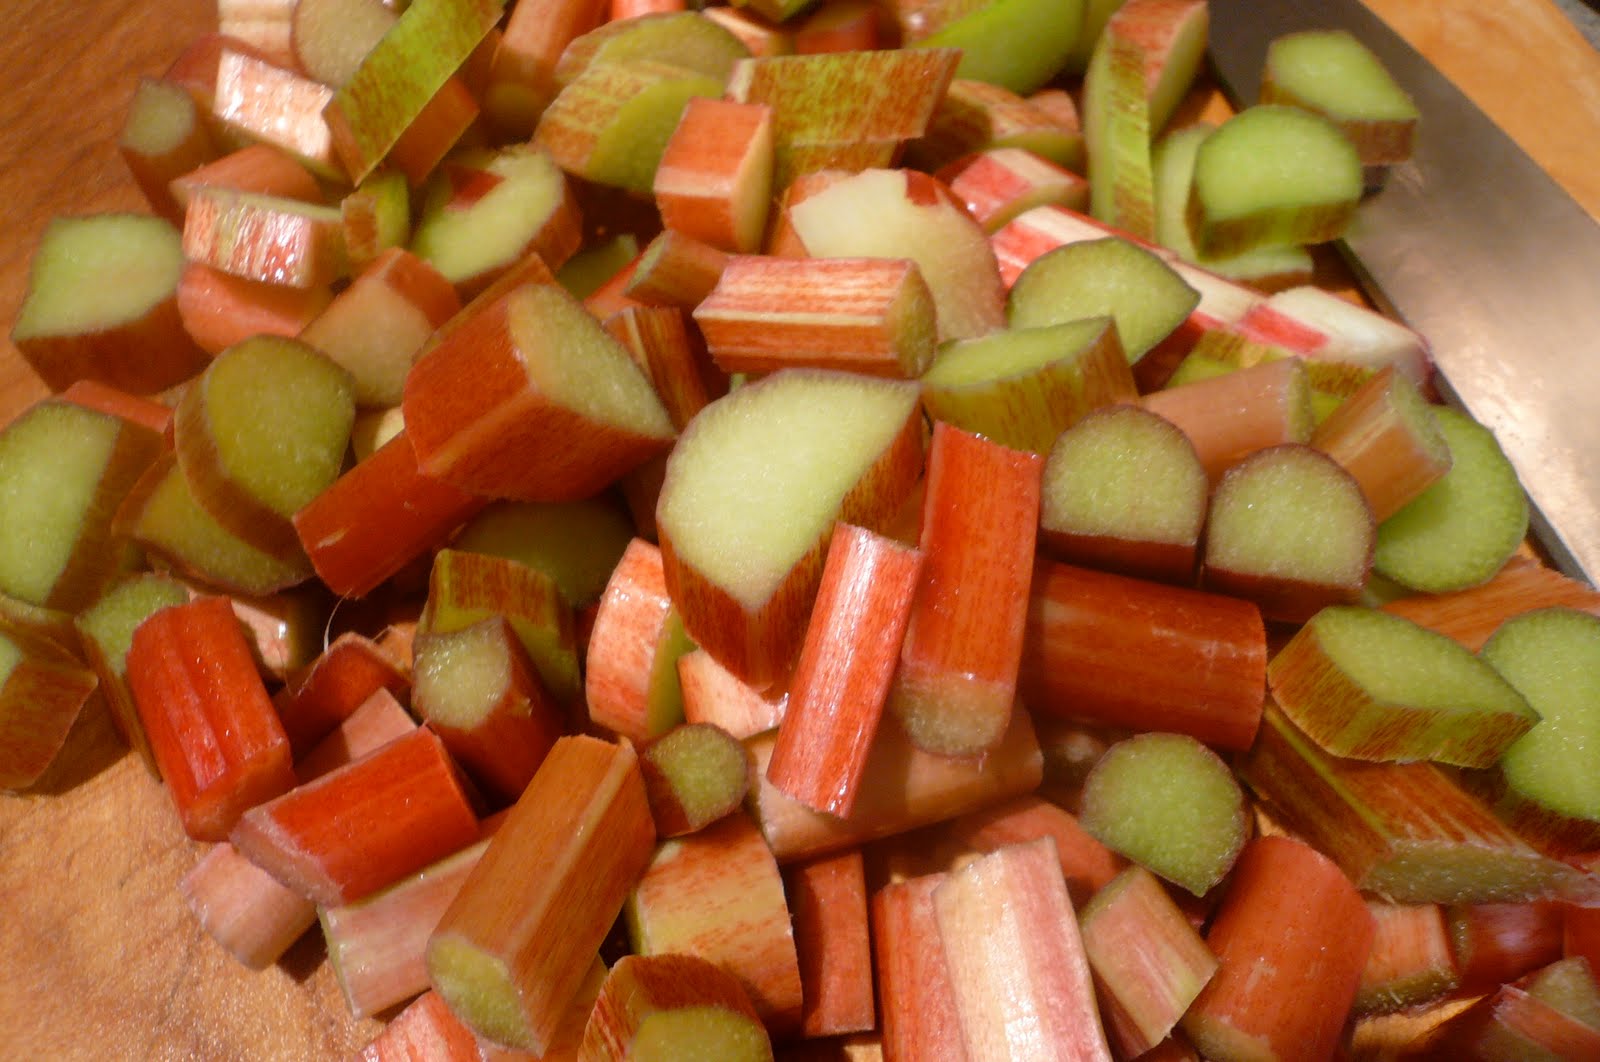
But even before we tilled the soil, there were big, beautiful rhubarb plants growing at the back end of the garden. A little gem left behind by the previous owners and taken care of by Mother Nature. I hadn't done much to nurture them and they started to flower. I finally went out there this past weekend and hacked off the flowers, pushed those big (toxic!) leaves back, and found the ruby colored stems I've been reading about.

I don't think I've ever eaten rhubarb, let alone grown it, so I needed to find an expert who would know what to do with this vegetable. I looked online and scoured my cookbooks, and stumbled upon Laura Pensiero's Hudson Valley Mediterranean cookbook. Laura owns Gigi Trattoria in Rhinebeck, N.Y., and is a major proponent of farm-to-table cooking. I figured she would know exactly what to do with rhubarb. And did she ever: a delicious and simple compote of rhubarb and strawberries.


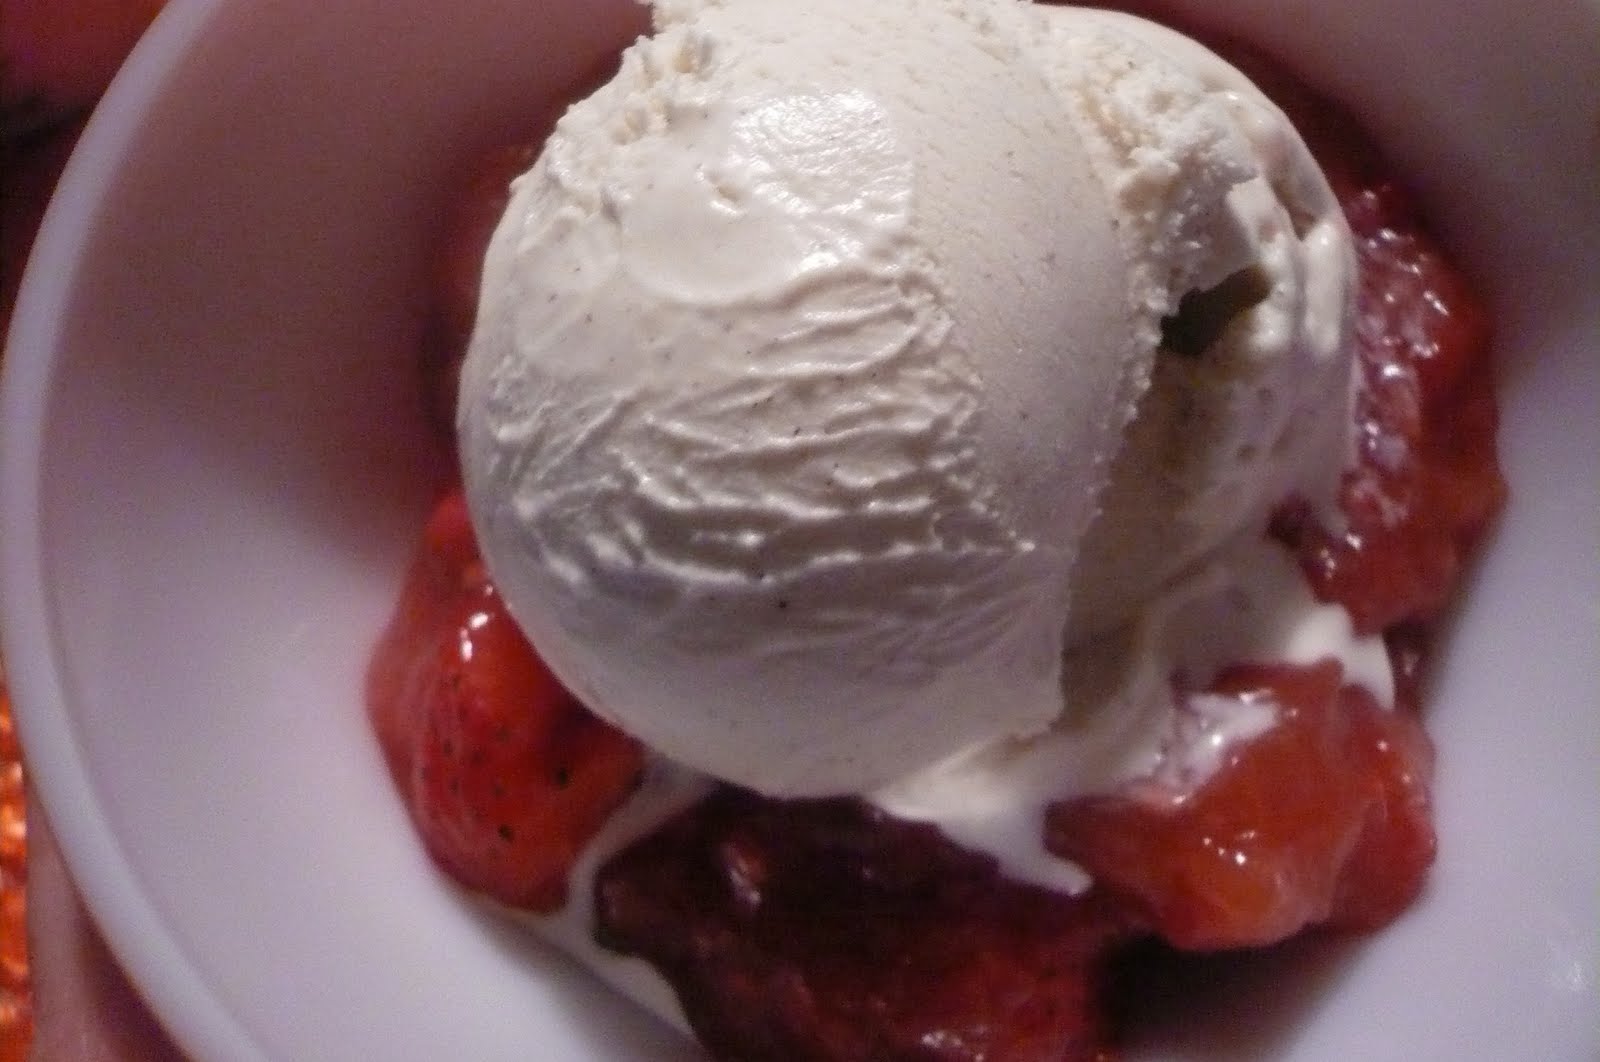
The really great thing about preparing this dessert was that it gets done in stages: chopped rhubarb gets added to sugar, honey, cornstarch and sits for 30 minutes (switch the laundry), next it gets heated and rests for another 30 minutes (pickup Vivi), then the berries get added (by Vivi, natch!), then it gets put on top of ice cream. Laura suggests putting it on pound cake, which I will definitely do the next time. But for Monday night's dessert we went for vanilla ice cream with rhubarb-berry compote. It was sweet, with a little bit of the tartness I expected from the rhubarb. Vivi ate it by the spoonful from the mixing bowl (I didn't dare tell her that rhubarb is actually a vegetable), and had two helpings with her ice cream. We have some left over and I'm thinking that it might work really well as a filling on a simple, rustic tart crust. Served warm with the rest of the ice cream? Guess what I'm doing this afternoon?


Here's the recipe.

Strawberry-Rhubarb Compote
(Adapted from Hudson Valley Mediterranean by Laura Pensiero)

1/4 cup cornstarch
3/4 cup sugar
1/3 cup honey
2 1/2 pounds rhubarb, washed, dried and cut into 1/2 inch pieces
1 cup quartered strawberries

Heat a metal mixing bowl in the oven just until it is hot. (I used a Dutch oven, which worked just fine). Remove the bowl from the oven and add the cornstarch, sugar, and honey (the heat of the bowl will help to melt the sugar and honey). Stir the honey, sugar, and cornstarch, and add the rhubarb. Coat the rhubarb with the sugar mixture and let it rest at room temperature for about 30 minutes. (The rhubarb will release its juices and the cornstarch will thicken it prior to cooking.)


Pour the mixture into a saucepan, along with all the accumulated liquid (this is where the Dutch oven came in handy). Cook over low heat, stirring constantly, until the rhubarb is fork-tender but not overcooked, about 10-15 minutes. Pour the compote into a heatproof bowl and let it cool to room temperature for another 30 minutes. Stir the berries into the cooled compote, and serve on ice cream.

I found that my compote was very thick after cooking, and I wanted to thin it a little. I had a mix of berries (raspberries, strawberries, blackberries) in the fridge. Vivi ate most of the berries as we were cooking, but the juice that was left over (about a 1/4 cup) was a great addition to the compote. It helped loosen it and it gave it even more berry flavor.

Monday, May 17, 2010

Kicking off the season


We officially started the backyard barbecue season this weekend when we had Fred's family come visit (that's a few of them above). We got a new grill last week, and fired it up for the first time on Saturday. The weather was perfect and the food was great. Nothing fancy: hamburgers, hot dogs, baked beans, potato salad, macaroni salad, and watermelon. Very traditional and classic. There's something about keeping it simple that is so appealing and comforting. The hamburgers were simply ground beef with salt and pepper, the baked beans were doctored up canned beans (secret ingredient: root beer), and the potato salad was Fred's grandmother's recipe. The simple pleasure of eating in the backyard.


I prefer to make homemade baked beans. The first time I did was just a few years ago. My parents were hosting a party for their neighbors to meet baby Vivian. Again, a simple backyard barbecue. I volunteered to make homemade baked beans (simply because I wanted to use the vintage bean pot that my mother had passed along to me), without fully realizing how long they take to make. What I also didn't calculate was that the last thing you want to do in a house without air conditioning on a 97° day in July is run the oven for 4 hours. Wow, was that a disaster. This last time, I cheated and used a recipe for souped up canned beans. The root beer was a clever addition, but I don't think it added that much. Next time back to the homemade. Here's how I make them:

Maple Baked Beans
(adapted from the forthcoming Time for Dinner cookbook by the editors of Cookie magazine)
Serves 6

1 pound dried navy or great northern beans
2 tablespoons brown sugar
2 teaspoons salt
1/4 teaspoon black pepper
2 tablespoons spicy brown mustard
2 tablespoons molasses
1/4 cup ketchup
1/2 cup pure maple syrup
2 strips thick-cut bacon

In a large pot, cover the beans with water. Bring to a boil and simmer until tender, about 1 hour, drain. Preheat the oven to 300 degrees (F). In a bowl, combine all remaining ingredients except the bacon. Stir in the beans. Place 1 strip of bacon at the bottom of a large ovenproof dish, Dutch oven, or antique bean pot that your mom gave you. Pour the bean mixture over it, then push the other strip of bacon into the beans. Add just enough boiling water to the pot to cover everything. Cover the pot with aluminum foil, then the lid. Bake 5 hours, checking every hour, or so, to make sure the beans aren't drying out. (Add more water as necessary to keep them submerged.)

Tuesday, May 11, 2010

Dinner without frustration


Two weeks ago we had a short, little spike in the temperature and managed to hit 90 degrees up in Copake. We weren't expecting the temperature to get so high, so soon and we hadn't removed all the storm windows from the second-floor windows.

As newbies to farmhouse ownership, Fred and I were convinced that we could easily get on a ladder and just slide the storms off. Oh, how naive? First off, we don't even own a ladder. But I found a place in Pine Plains that would rent me one. However, they were closing at 1 o'clock (it being a Sunday), and they are a half hour drive away. So we only had about an hour to get 7 windows done. We assured ourselves that it could be done.

Guess again. The first thing I did wrong was not figure out exactly how tall of a ladder I needed. I guessed that in order to reach the top of the second floor I would need a 40-foot ladder. No way! That would get me to the roof! The second thing I did wrong was not consult Mom. She very helpfully told me, after the fact, that all I needed was a 20-foot ladder, since each story of a house is approximately 10 feet. Thanks for the tip, Mom. How about next time you share that BEFORE I rent a 40-foot ladder? Anyway, as you can guess, it didn't work. It only got me incredibly frustrated and suddenly I was the crazy, cursing maniac on the front lawn screaming about storm windows and ladders. (The neighbors, I'm sure, were laughing at me.)

So the ladder was safely returned (oh, don't even ask me about driving with a 40 foot ladder tied to the roof of my Subaru!), and we redirected our attention to the grass that desperately needed to be cut. I pulled out the old push mower that the previous owners left for us. It started right up and I was pleased as punch that I would manage to get a chore done. Not so fast, Germann. The lawn mower stalled and wouldn't start. Again the crazy, screaming maniac appeared—in the backyard this time.

After fuming for a minute, I noticed Fred standing in the driveway chatting with some guy. Fred waved me over and introduced me to Colton, the grandson of the couple we bought the house from. He was driving by and noticed that the grass needed to be cut. Did we need some help? How did you ever guess?

With that he agreed to cut the grass and, guess what chore he had to do every spring? Yup, you guessed it, remove the storm windows. He and his father showed up an hour later with two (yes, two) ladders and got the storms down. They have a system where they put a ladder on each side of a window, they each go up a ladder, take the storm window off the frame, and then descend the ladders in tandem, each holding one side of the storm window. I can tell you—and you won't be surprised to hear this—Fred and I would never have been able to figure that out. Hell, we didn't even have one ladder, let alone two!

Once that was done, it was time to shift gears to dinner. After such a frustrating day I needed to make something that couldn't go wrong and couldn't disappoint. I chose wisely: shrimp with lemon and orzo. Put up a pot of water to boil the orzo, get a pan hot to sear the shrimp. Chop garlic and parsley. That's about it. So simple. So tasty. And a big hit with the five-year old.

Here's the recipe (serves 4).
Adapted from a recipe from myrecipes.com newsletter (originally published in Cooking Light)

1 cup uncooked orzo
2 tablespoons chopped fresh parsley
1/2 teaspoon salt, divided
7 teaspoons unsalted butter, divided
1 1/2 pounds peeled and deveined jumbo shrimp
1 tablespoon minced garlic
2 tablespoons fresh lemon juice
1/4 teaspoon black pepper

Preparation

1. Cook orzo according to package directions, omitting salt and fat. Drain. Place orzo in a medium bowl. Stir in parsley and 1/4 teaspoon salt; cover and keep warm.

2. While orzo cooks, melt 1 tablespoon butter in a large nonstick skillet over medium-high heat. Sprinkle shrimp with remaining 1/4 teaspoon salt. Add half of shrimp to pan; saute 2 minutes or until almost done. Transfer shrimp to a plate. Melt 1 teaspoon butter in pan. Add remaining shrimp to pan; saute 2 minutes or until almost done. Transfer to plate.

3. Melt remaining 1 tablespoon butter in pan. Add garlic to pan; cook 30 seconds, stirring constantly. Stir in shrimp, juice, and pepper; cook 1 minute or until shrimp are done.

I combined the orzo and shrimp in a mixing bowl, but you could serve them separately. I also cooked some asparagus in a grill pan and served that on the side.


Saturday, May 8, 2010

Mother's Day


Unpacking boxes that were stored for at least ten years—from Carl's parent's house to Manhattan Mini Storage to finally the attic in our new upstate house—I came across a relish dish that brought back memories of my Mom. She died in 1993, when I was 29 years old. Being Mother's Day this weekend, I thought it was appropriate to post about her today. Mom was amazing because she left my dad, at the age of 34, and raised us seven kids on her own. She had no job and drove a Corvaire given to her by a friend. I'll have to write a book to tell the whole story. She loved to cook and eat and she loved doing both with her brood of seven—me, my four brothers, and two sisters.

She cooked dinner almost every night of the week, from her 1970's-perfect bacon-covered-mixed-meat (beef, pork, veal) meatloaf to her easy, flour-drenched baked "fried" chicken. During the week we kids would often skip dinner because of a game, school project, or sleepover at a friend's house, but on Sundays, everyone had to be home for dinner. No excuses. And this is when Mom shined in the kitchen—from the roasts with all the fresh vegetables to the famous chicken cutlets with tomato-juice gravy (I still make it today!), to her spaghetti with sausage and meatballs in homemade red sauce. I can still taste her food and see the smile on her face as she looked upon all her children chatting, arguing, laughing, and eating. No matter what, we were at that oval, sagging dining room table with the terrible orange lighting above us happily awaiting what Mom would serve. This tradition lasted until the Sunday before Mom died.

So when I tore away the old newspaper from the relish dish I thought about the asparagus she might have served in the dish, or the pickles at a barbecue, or the slices of celery with cream cheese at the "special" occasions, like graduations, First Communions, and Birthdays. When Carl said "What are we ever going to serve in this dish?" I said "I know the perfect thing."

Here's to you Mom. Thanks for passing on your love of food and cooking to me and for keeping us all together for dinner at least once a week. I hope I can do the same for Vivi. Happy Mother's Day!

Lamb chops + pea shoots = Mother's Day


"Someone set the table." I can't begin to count how many times I heard my mother shout that from the kitchen as she finished up making dinner. Well, now as I an adult, I find myself longing for those simple days of coming home and not having to think about preparing dinner. On weekends, however, making dinner becomes a project that I look forward to all week. For Mother's Day weekend, I decided to set the table for Mom—without being asked to do so—with a dish that she loves to eat but would never make for herself: lamb chops with mint-parsley sauce.

Our new house upstate is where Mom lives full time, and Fred, Vivi, and I spend our weekends. We all went into this little "project" of living together after my Dad died and Mom was on her own. We pooled the little bit of money that we had and bought an old farm house with an attached apartment in a sleepy, little hamlet in the farm country of upstate New York. Not too far from where I grew up, but a very different way of life.

This weekend we all went on a two-hour driving tour of the farmland in search of pea shoots. I had become obsessed with the idea of having these tender little sprouts with lemon and shrimp. But then when I realized it was Mother's Day, I had to change it up a little for mom and the shrimp became lamb chops and the lemon became mint. The mint came from a patch growing like crazy in the backyard, and the pea shoots came from Little Seeds Farm via the Hawthorne Valley Farm Store. I insisted on driving all of us up to Harlemville to go to the farm store specifically for pea shoots. Well, guess what? Nobody objected, and we all went along on a little journey.

Well, the bigger journey of having three generations of my family living under one roof has been a great experience. Watching Mom teach Vivi how to plant pansies, eating dinner together at the same table that I ate dinner at when I was growing up, and going through boxes of old photos have all become memories as indelible as the original moments. Being able to share the experience of getting to know a new neighborhood and live in a new house with not only my partner and daughter but also my mother has turned out to be a richer experience than I ever thought.

So, Mom, on this Mother's Day, enjoy a table set especially for you. This meal is filled with love and appreciation of all those dinners you made for me.

Thursday, May 6, 2010

Shakes for breakfast


Vivi has been in a bit of a breakfast rut. Although she doesn't seem to mind eating Honey Nut Cheerios every morning, I go crazy giving her the same thing every day. My offers of eggs, yogurt, toast with peanut butter all get answered with the same, "No," in a tone of complete annoyance. So I dug out the old shake maker machine from the back of the cabinet and decided that we would have shakes for breakfast.

Rather than making smoothies, which would require the blender, I opted for more of a New England style shake, i.e., no ice-cream. Whereas for most of the country a shake automatically means ice cream, in New England that would be a frappe. I can remember the first time I made the mistake of ordering a shake in a Boston ice-cream parlor and, boy, was I disappointed when all I got was a big cup of chocolate milk. Tasty, but not quite what I had in mind at the time. However, by telling a 5 year old we can make shakes just like they make them where Papa went to school, the lack of ice-cream comes in handy.

Vivi was excited by the machine itself, and she insisted on helping make the first batch. So in went some yogurt, some berries, and milk. Turn on the machine and watch it froth up. Now, keep in mind that a lot of the fruit will sink to the bottom of the cup and not get crushed, so you need to serve this with a spoon and a straw. Vivi didn't like the pieces of fruit in her cup so we made a second batch of simply yogurt and milk. She downed it just as we headed to the door for the bus. I finished off the rest and felt good that Vivi had more than just Cheerios for breakfast.

Tuesday, May 4, 2010

Pizza night!


Homemade pizza has become a staple in our house. By homemade I mean that we buy the dough at Whole Foods and then we roll it out and put on our own toppings. I know, you're thinking, "big deal, we all do that." But what makes our pizza so spectacular is two things: the sauce and the stone.

In my hierarchy of the importance of pizza ingredients I put the sauce before the cheese. Maybe I'm crazy but I have a higher tolerance for cheap, greasy cheese than I do for cheap, corn-syrupy jarred sauce. Use the latter and the whole pie is ruined. So we went on a search for the perfect sauce. We found a few that were pretty close to what we wanted but not quite there. Then my friend Jenny from dinneralovestory recommended Don Pepino Pizza Sauce. The search was over. That yellow can. That fat chef. Those sweet tomatoes. The balance of tomatoes and herbs is exactly what we've been striving for in our attempts at homemade pizza sauce but haven't been able to achieve. Although it isn't available everywhere, it's worth hunting for.


The other important part of making our pie is the pizza stone. For years I thought that a pizza stone was one of those kitchen gadgets that would be as useful as a mussel pot or asparagus steamer. You know, that thing you had to have and then used once and put away forever. But then I got one. And now I can't imagine living without it. It stays right in the oven, and we use it for everything from keeping pancakes warm to baking frozen french fries to, well, pizza. It gets the crust golden brown and crispy. And with a well-seasoned stone the pie easily slides off to rest on a big, old cutting board before slicing.

Now in terms of toppings, that is such a personal thing. In our house black olives, garlic, and mushrooms (not Vivi!) are always popular. Vivi has a way of eating a slice of pizza that I have never seen before. She takes the whole thing apart and then eats the olives, the cheese, the outer crust, and finally the sauce-laden bottom crust (torn into bite-size pieces). It takes about a half hour for her to eat one slice. By that time Fred and I have polished off the rest of the pie, sung our praises to Don Pepino, and cracked open a frosty beer.